INSTALLATION PROCESS - Shallow Beam Coffered Ceiling Kits
THE MOST EFFICIENT AND PRECISE METHOD FOR COMPLETING A LOW PROFILE COFFERED CEILING BEAM TREATMENT
The Tilton Shallow Beam Coffered Ceiling installation process is Quicker, Easier and more Precise than ANY conventional method for installing an equivalent type coffered ceiling treatment. The following steps outline how a typical Custom Shallow Beam Kit is installed:
STEP 1:
Measure and Mark

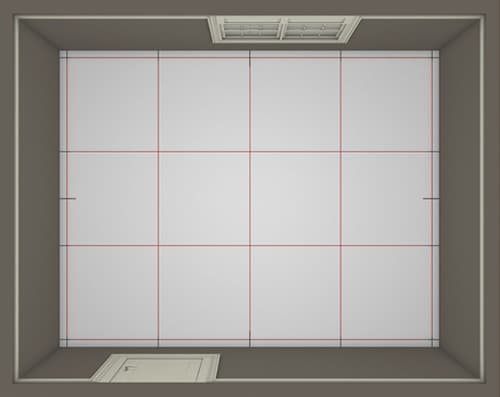
- Measure and mark the center points for the beam layout on the ceiling surface
- Snap chalk lines to connect the center point marks across the entire ceiling area (shown in red).
TOOLS NEEDED FOR THIS STEP:

STEP 2:
Secure the Beam Fittings

- Apply adhesive to the back of the Beam Fittings and position them centered on the appropriate chalk lines.
- Secure the Beam Fittings to the ceiling surface with finish nails.
TOOLS NEEDED FOR THIS STEP:

STEP 3:
Install the Beam Lineals and Perimeter Moldings

- Cut to length and install the Beam Lineals between the Beam Fittings using adhesive and finish nails.
- Install the Perimeter Molding around the entire perimeter of the ceiling.
TOOLS NEEDED FOR THIS STEP:


